(603)-742-8812
Established In 1981
Cylinder Head & Block Crack Repair Fusion Welding Process
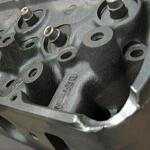
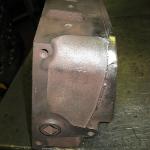
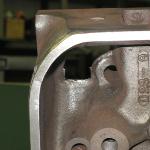
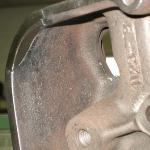
Cast Cylinder Head Repair
Click on image for larger view & information.
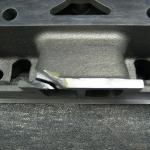
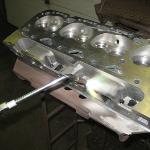
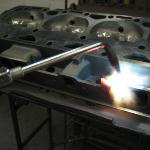
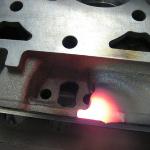
In this day & age finding an undamaged core is a rare event. One alternative repair method is powder welding (spray welding). The spray welding technique has been around for about 40 years. The advantage to this method is, it gives you just as strong a repair as fusion welding without as much heat. You still have to preheat and postheat the head, but not nearly as high of a temperature or for as long. Only the weld area gets hot so you do not get the distortion you do with hot welding.
By Larry Carley
Ask any engine builder who has pulled a cylinder head off a late model engine and he or she will agree: cracks are a serious problem today.
It seems as if many cylinder heads are doomed to crack from the very start because of their lightweight construction and design. Aluminum overhead cam (OHC) heads, in particular, are often found to be warped as well as cracked. But so too are many pushrod cast iron heads.
One of the causes of cracking in cast iron heads is stress created when the valve seats are induction hardened. The concentrated heating process that hardens the valve seats also creates residual stresses in the head that may cause it to crack later - even if the engine has never overheated. The cracks typically form where stresses are highest, which is often between the valve seats.
Some heads, such as Ford 2.9L V6 and Escort 1.6L heads, are notorious for cracking. Others with a known history of cracking problems include Ford 2.3L and 2.5L "HSC" (high swirl combustion) cast iron heads, General Motor's 2.5L "Iron Duke" heads, the GM 250 six-cylinder head with an integral exhaust manifold and 1987 and later Chevy small block V8 "Vortex" heads.
Dodge has also been having cracking problems with the cast iron heads on its late model 318 Magnum engines. Almost all of these heads are found to have cracks between the valve seats when the engines are rebuilt.
Regardless of the engine, cracks are often found between valve seats, in exhaust ports, between the spark plug hole and valve seats, around valve guides, between combustion chambers, even on top of the head.
They're often blamed as the cause of a head failure. But in many instances, the cracks are not the cause of the failure but a symptom of another underlying problem such as overheating, detonation or incorrect installation (wrong torque on head bolts, dirty bolt threads, etc.).
Why Heads Crack
Cracks typically form when a cylinder head undergoes too much thermal stress. Loss of coolant, severe overheating as well as sudden changes in operating temperature from hot to cold can all create the conditions that can cause cracks to form.
Simply put, when metal is heated it expands. Aluminum expands at nearly twice the rate of cast iron, which creates a mismatch in expansion rates on bimetal engines with aluminum heads and cast iron blocks. While the heads are designed to handle a certain amount of normal expansion, elevated operating temperatures can push a head beyond those design limits, causing the metal to deform. This, in turn, may cause cracks to form as the metal cools and contracts.
When overhead cam heads get hot, they often swell and bow up in the middle. This may cause the OHC camshaft to seize or break as well as cracks to form in the underside of the head. Pushrod heads are not as thick as OHC heads so are less vulnerable to this kind of stress and warpage. But even pushrod heads have their limit, and when pushed too far will also warp and crack.
Finding Cracks
If a crack forms between the cooling jacket and combustion chamber, port or any other external surface on the head, it may leak coolant. If the leak is in a combustion chamber, it may go undetected until the engine overheats from a loss of coolant. Coolant in the combustion chamber can accelerate ring and cylinder wear and is murder on the bearings. If the leak is large enough, it may even hydrolock the cylinder.
Combustion gases entering the cooling system through the crack can also accelerate coolant breakdown and corrosion. Pressure testing the block and heads to see if they hold pressure is a good technique for finding these kind of "hidden" cracks as well as porosity leaks in aluminum castings.
Coolant leaking into the exhaust system through a crack in an exhaust port can expose the catalytic converter and oxygen sensor to silicone contamination. Silicone has the same coating effect on these components as lead, and will eventually ruin the O2 sensor and converter.
External coolant leaks due to cracks are not as common because the outside of the head runs considerably cooler than the combustion chamber and exhaust port surfaces. Even so, cracks sometimes form in these areas that leak coolant.
"Dry" cracks which do not leak coolant may or may not cause problems depending on where they form. Cracks between or around valve seats in an aluminum head may allow the seats to work loose and fall out. Cracks around valve guides may lead to loosening of the valve guides which can damage the valves.
Even if a crack is causing no apparent problems, it should not be ignored because most cracks tend to propagate and spread over time. In other words, little harmless cracks can turn into big nasty cracks, and there's no way to predict when that may happen or how far a crack will grow.
Many cracks are obvious to the naked eye, but others have to be ferreted out by various means. Magnetic particle inspection has long been a popular technique for identifying cracks in cast iron heads. But this technique does not work on aluminum because aluminum is nonmagnetic. Aluminum heads must either be pressure tested and/or sprayed with penetrating dye to find cracks and porosity leaks. Cast iron heads should also be pressure tested to check for hidden cracks in cooling jackets and ports that are not directly observable from the outside.
The important point here is that all heads should be thoroughly inspected for cracks before any machine work is done. Better to find out the head is cracked before you rework the valve guides and seats than afterward. Think of crack detection as your first line of defense against comebacks.
Prognosis
Cracks do not necessarily mean a cylinder head has to be replaced. In fact, many cracked heads that were once thought to be "unrepairable" are now being fixed. Repairing a cracked cylinder head always involves a certain amount of risk, but when done properly is usually much less expensive than replacing a cracked head with a new or used casting. Most small cracks in cast iron as well as aluminum heads can be repaired by pinning. Larger cracks in aluminum heads typically require TIG (Tungsten Inert Gas) welding. Larger cracks in cast iron heads can often be repaired by furnace welding or flame spray welding.
Furnace welding a large cast iron diesel head is often well worth the effort because of the high value of the casting, but it also makes economic sense on many late model cast iron passenger car heads if the head can be repaired for less than the cost of a new or used casting. Many late model heads are fairly expensive and hard to find, so some heads that would have been scrapped because of cracks are now being repaired and returned to service. It all depends on the market value of the head and the cost to replace it with a new or used casting. The higher the value of the head and the higher its replacement cost, the more sense it makes to repair the head rather than replace it.
Furnace Welding Cast Iron Cracks
Furnace welding cast iron is often called the "black art" of crack repair because it requires lots of heat and operator skill. Learning how to furnace weld cast iron is not something an inexperienced welder can pick up quickly. Those who have mastered the process say it takes at least six months to a year of constant practice to master it. If it were that easy, everybody would be doing it. It isn't, and that's why some shops have created a successful niche for themselves by specializing in furnace welding cast iron heads.
To furnace weld a cast iron head, the head is first preheated to 1,300° F (cherry red) in an oven. This step is absolutely essential to minimize thermal shock and to relax the metal so it won't distort when the torch is applied to the casting.
When the head preheat temperature has stabilized (it takes about an hour), a "neutral flame" oxyacetylene torch with slightly more acetylene than oxygen is used to melt the cast iron (which melts at 2,400° to 2,600° F). The crack can then be filled using a 1/4" cast iron filler rod and Borax flux. The trick here is to keep the weld clean by adding a little flux so the impurities will rise to the top. The impurities can then be floated out of the repair area with the torch.
When building up a worn or damaged valve seat in a cast iron head, a carbon graphite plug can be used to fill the hole. The weld is then built up around the plug. The puddle will be about half an inch deep and maybe two inches in diameter. It takes a lot of heat to do this, about 5,000° F.
After the crack has been filled comes a long, slow cool down. This step is also essential to prevent the head from re-cracking. If cast iron cools too quickly, the surrounding metal can shrink away from the weld causing new cracks to open. Carbon in the iron can also turn to carbide making the metal too hard and brittle to machine. The casting must therefore be cooled very slowly to prevent these undesirable metallurgical changes. Slow cooling can be accomplished by wrapping the head in an insulating blanket and keeping the head in a hot box so it will cool at a rate of no more than 200° F per hour. At this rate, it may take 8 to 12 hours to slow cool back down to room temperature. Once the head has cooled, it can be cleaned to remove scale, machined and pressure tested a second time to recheck for leaks. If no leaks are found, the final machine work and assembly can be done. Some shops will even pressure test the head a third time if it has pressed-in valve seats to make sure no cracks opened up after the seats were installed.
Because of the high temperatures involved in furnace welding, the induction hardening of integral valve seats is usually destroyed. This may require replacing the exhaust seats so the seats don't pound out when the head is returned to service. For this reason, some shops prefer to braze weld cracks rather than furnace weld. With braze welding, the job can be done at 800° to 900° F so the head doesn't get as hot.
Flame Spray Welding Cracks
Another technique for repairing cracks in cast iron heads and blocks is flame spray (powder) welding. The process is similar to brazing but uses nickel powder and a special torch to produce high strength repairs.
The basic technique for flame spray welding cast iron has been around for 40 years but has only recently been adapted for automotive applications. The main advantages of this technique is that it is easier and faster than furnace welding.
Flame spray welding can create a strong and long-lasting repair the same as furnace welding but without as much heat. The head still has to be preheated and postheated, but not as much nor as long. Spray welding needs about 1,000° to 1,400° F of preheat. Only the weld area gets hot so there is little risk of distortion.
Flame spray welding uses nickel-based powders and requires a special torch. The oxyacetylene spray welding torch has a trigger-operated hopper that feeds nickel powder into the flame. When the powder is exposed to the flame, it melts and fuses to the sides of the crack to fill the repair area. The process is similar to brazing but results in a much stronger repair. The powder can be used to fill holes and cracks, and to build up worn or damaged valve seats.
The process goes very quickly and can fill a three inch hole in less than a minute. With furnace welding, it might take three times as long to fill the same size hole - and then the part must be slow cooled for hours to keep it from cracking.
Flame spray welding is easier to learn than furnace welding, but still takes training and time to learn. Cracks must be properly prepared by grinding out damaged areas with a V-shaped chamfer. Both sides of the repair area must be clean. The key to success is applying the right amount of heat to the repair area. A dull cherry red, or about 1,300° to 1,400° F is needed; otherwise the nickel powder may not adhere properly.
TIG Welding Aluminum Cracks
Cracks in aluminum heads are most often repaired by TIG welding (though pinning also works with small accessible cracks). The first step in welding aluminum is preparing the crack. The head must be clean, grease-free and dry before grinding out the crack. The crack must be ground all the way out. Just grinding the surface and welding over a crack will likely be a short-lived temporary fix because the underlying crack is still there and will continue to grow. After grinding, the surface of the metal should be cleaned with a stainless steel wire brush.
When exposed to air, aluminum forms an oxide coating that contaminates the weld and interferes with fusing. A TIG welder prevents the formation of the oxide layer by bathing the weld with a steady supply of inert gas (usually argon). An alternating current is used to alternately heat the metal and burn off any oxide that forms.
Because aluminum can crack when subjected to too much heat in a concentrated area, the head must be preheated in an oven to 450° to 550° F to eliminate thermal stress. The added heat also makes the head easier to weld because aluminum conducts heat away from the weld area rapidly. Keeping the head hot is one of the tricks to successfully welding aluminum, which requires working in an area free from drafts and occasionally reapplying heat to the head.
Welding techniques vary, but the basic idea is to melt the surrounding metal and fill the crack with molten metal and filler rod. An experienced welder can even "recast" a badly damaged area, saving a head that would otherwise be junk. The strongest welds are achieved by using a filler rod that's the same alloy as the head, or very close to it. Two filler rods that work well are #4043 and #5356 with 5 percent magnesium. The type of electrode that's used on the welder can also make a difference. Tungsten thorium electrodes work well with aluminum but zirconium tungsten electrodes (which are much more expensive) are considered the best.
After welding, the head must be allowed to cool slowly. This is done by placing the head back in the oven or wrapping it in an insulating blanket. A long slow cool down relieves stress in the metal, which if not relieved could lead to cracking.
Pinning Cracks
Pinning is the most commonly used technique for repairing cracks in cast iron heads because it's fast, reliable and cheap. It can also be used to repair aluminum castings, too. Pinning is a relatively easy technique to learn and use, doesn't require any special tools other than a drill, guide fixture and tap, and uses no heat.
The technique involves drilling holes in both ends of the crack to keep it from spreading, then drilling holes at various intervals along the length of the crack, installing overlapping pins to fill the crack, then peening over the pins with an air hammer to seal and blend the surface. Either tapered pins or straight pins may be used.
Tapered pins pull themselves into a crack as they are tightened to provide a tight seal along the entire length of the pin. This occurs because the threads on both the tapered pin and hole have an interference fit. Sealer really isn't necessary, but may be used for added insurance. The holes for tapered pins must be carefully hand tapped with a tapered tap, and the pins hand tightened.
Straight pins, by comparison, can be installed with an ordinary straight tap and a power drill. Straight pins, however, must be sealed by a tapered shoulder on one end of the pin and/or with sealer.
If a crack is along an outside edge or corner that require support to hold the sides of the crack together, or if the crack is in an area that would open up or pull apart when the casting is under load or gets hot, ordinary pins won't work. One solution is to use "locks" to hold the two sides of the crack together, and/or to use special pins that have a "spiral hook" or "reverse pitch" thread pattern. These pins can actually hold a crack together rather than just fill it.
Cracks in thin areas of a casting (thinner than 1/8") can be difficult to repair because the metal isn't thick enough to support the threads on a standard pin. For these applications, very small pins must be used to fill the crack.
On some applications, such as the Dodge 318 Magnum heads, the crack between the valve seats can often be repaired with a single soft steel pin that has a countersunk shoulder. A steel pin works best in this application because it can withstand heat better than a cast iron pin. After the crack has been fixed, the seats can be
Crack Repair Methods Explained
R & L Engines in shop technicians have built up an extensive range of experience in crack repair utilizing the Lock & Stitch pinning method and welding processes. Expert crack repair range from small to large cylinder head, manifold and engine block application. Our In shop team, comprising of highly skilled technicians all with many years experience in mechanical equipment crack repairs will succeed where many others have failed. R & L Engines main focus is to provide accurate reliable crack repairs in shop and on reducing equipment downtime, and increasing productivity.R & L Engines utilizes welding and pinning processes to repair cracks in diesel and automotive cylinder heads and blocks.Once repaired all components are pressure tested to insure the integrity of repair. Our test procedures include dye penetrate, Magnuflux process and pressure testing. Ceramic circulation is also offered.
